Talos OS 이란?
- 클라우드 네이티브 환경에서 Kubernetes 클러스터를 실행하는 데 최적화된 컨테이너 기반 리눅스 배포판
- 관리와 보안을 중점으로 설계된 Talos OS는 Kubernetes의 컨트롤 플레인과 워커 노드를 효율적으로 운영할 수 있도록 간소화된 방식을 제공하며, 자동화와 관리의 복잡성을 최소화한 운영체제이다.
주요 특징
No Bash. No SSH. No Systemd.

- 초경량 운영체제
- Talos OS는 Kubernetes를 실행하기 위한 기본적인 요구 사항에 초점을 맞춰 최소한의 기능만 포함됨
- OS 내 Package Manager, Shell(터미널), SSH 서버 등을 지원하지 않으며, 완전한 API 기반으로 관리됨
- API 중심 관리
- 기존 명령어 기반 관리가 아닌 모든 운영은 API로 관리되어 자동화, 확장성, 간소화가 쉬움
- talosctl 전용 도구를 사용하여 클러스터 설정 및 디버깅 가능
- 보안 강화
- 읽기 전용 루트 파일 시스템으로 동작해 안정성과 보안을 제공
- 자동화된 업데이트와 재부팅 없이도 클러스터의 안정성을 유지.
- Kubernetes 네이티브 통합
- Kubernetes의 관리 작업을 단순화하며, 클러스터를 빠르게 설정하고 유지할 수 있도록 최적화.
- 다양한 클라우드 및 온프레미스 환경에서 Kubernetes를 실행 가능.
- 운영 편리성
- 운영체제의 설정을 선언적 방식(immutable)으로 정의
- YAML 파일로 Machine의 설정을 정의
- DevOps 및 GitOps Workflow와 호환 및 통합이 쉬움
- 운영체제의 설정을 선언적 방식(immutable)으로 정의
- 빠른 배포
- 클러스터 생성, 업그레이드, 재배포가 몇 분 만에 완료됨.
- Kubernetes 환경을 신속하게 배포 가능
- 단순성과 안정성
- Package Manager, SSH, Patch 작업 등 별도의 설정 관리 도구가 필요 없으며, 이로 인해 오류와 중단 가능성을 크게 줄임
- 단점
- Secure Shell(이하 SSH)가 없으므로 전통적인 디버깅 방식이 제한됨
- 일반적인 리눅스 운영체제로 사용하기 어렵고 Kubernetes 이외의 작업에는 부적합

지원 시스템
플랫폼 구분 | 이름 | 비고 |
|---|---|---|
Bare Metal | Equinix Metal | Creating Talos clusters with Equinix Metal. |
ISO | Booting Talos on bare-metal with ISO. | |
Matchbox | In this guide we will create an HA Kubernetes cluster with 3 worker nodes using an existing load balancer and matchbox deployment. | |
Network Configuration | In this guide we will describe how network can be configured on bare-metal platforms. | |
PXE | Booting Talos over the network on bare-metal with PXE. | |
SecureBoot | Booting Talos in SecureBoot mode on UEFI platforms. | |
Virtualized | Hyper-V | Creating a Talos Kubernetes cluster using Hyper-V. |
KVM | ||
OpenNebula | ||
Proxmox | Creating Talos Kubernetes cluster using Proxmox. | |
Vagrant & Libvirt | ||
VMware | Creating Talos Kubernetes cluster using VMware. | |
Xen | ||
Cloud | Akamai | Creating a cluster via the CLI on Akamai Cloud (Linode). |
AWS | Creating a cluster via the AWS CLI. | |
Azure | Creating a cluster via the CLI on Azure. | |
CloudStack | Creating a cluster via the CLI (cmk) on Apache CloudStack. | |
DigitalOcean | Creating a cluster via the CLI on DigitalOcean. | |
Exoscale | Creating a cluster via the CLI using http://exoscale.com | |
GCP | Creating a cluster via the CLI on Google Cloud Platform. | |
Hetzner | Creating a cluster via the CLI (hcloud) on Hetzner. | |
Kubernetes | Running Talos Linux as a pod in Kubernetes. | |
Nocloud | Creating a cluster via the CLI using qemu. | |
OpenStack | Creating a cluster via the CLI on OpenStack. | |
Oracle | Creating a cluster via the CLI (oci) on http://OracleCloud.com . | |
Scaleway | Creating a cluster via the CLI (scw) on http://scaleway.com . | |
UpCloud | Creating a cluster via the CLI (upctl) on http://UpCloud.com . | |
Vultr | Creating a cluster via the CLI (vultr-cli) on http://Vultr.com . | |
Local | Docker | Creating Talos Kubernetes cluster using Docker. |
QEMU | Creating Talos Kubernetes cluster using QEMU VMs. | |
VirtualBox | Creating Talos Kubernetes cluster using VurtualBox VMs. | |
Single Board | https://www.talos.dev/v1.8/talos-guides/install/single-board-computers/ |
아키텍처

이름 | 설명 | 비고 |
|---|---|---|
EFI | EFI boot 데이터를 저장 | |
BIOS | GRUB의 두 번째 단계 부팅에 사용 | |
BOOT | 부트 로더에 사용, initramfs 및 커널 데이터를 저장 | |
META | node id's와 같은 탈로스 노드에 대한 메타데이터 저장 | |
STATE | 클러스터 검색을 위한 node identity data, machine configuration 등 KubeSpan 정보를 저장 | |
EPHEMERAL | ephemeral 상태 정보를 저장, mounted at /var |
라이센스
Talos OS는 Apache 2.0 라이선스이다. 이는 오픈소스 라이선스로, 개인, 비즈니스, 상업적 목적을 포함한 다양한 용도로 자유롭게 사용할 수 있음을 나타낸다.
- 상업적 사용 가능
- Talos OS를 상업적 제품이나 서비스에 포함하여 사용할 수 있음
- 수정 및 배포 허용
- 소스 코드를 수정하고 재배포할 수 있음
- 수정한 내용은 명시적으로 언급해야 함(변경사항을 알릴 의무)
- 라이선스 명시 요구
- Talos OS를 사용하는 소프트웨어에 Apache 2.0 라이선스 사용 사실을 명시해야 함
- 책임 면제
- Talos OS의 사용으로 발생하는 문제에 대해 개발자는 책임을 지지 않음
- 주의점
- 상표 사용: Apache 2.0 라이선스는 Talos OS 이름이나 로고를 상업적으로 사용할 권리를 포함하지 않으며, 상표 사용 시 별도의 허가가 필요할 수 있음
Talos OS는 비즈니스에서 자유롭게 사용할 수 있으며, 라이선스 조건을 준수하면 상업적 활용에도 문제가 없다.
Talos OS 설정
필요 조건
- 작업 컴퓨터
- talosctl
- kubectl
- 서버
- Control Plane
- Worker
talosctl
curl -sL https://talos.dev/install | sh
talosctl version
kubectl
export OS="$(uname -s | tr A-Z a-z)" ARCH=$(test "$(uname -m)" = 'x86_64' && echo 'amd64' || echo 'arm64')
curl -LO "https://dl.k8s.io/release/$(curl -L -s https://dl.k8s.io/release/stable.txt)/bin/${OS}/${ARCH}/kubectl"
sudo install -m 0755 ./kubectl /usr/local/bin/kubectl
kubectl version
설치
이미지 준비
- 다운로드 링크 : https://factory.talos.dev
- Boot ISO (OS Image)
- Initial Install Image

서버 구성
hostname | type | private_ip_address | mac_address | spec |
|---|---|---|---|---|
talos-cp-01 | control plane | 192.168.0.106 | BC:24:11:E3:03:3E |
|
talos-worker-01 | worker | 192.168.0.107 | BC:24:11:42:0B:D4 | |
talos-worker-02 | worker | 192.168.0.108 | BC:24:11:2A:F5:CA |

Talos OS 사용
disk 확인
참고: 기본적으로 Talos 구성은 /dev/sda에 설치되며, 설정에 따라 가상 디스크가 다르게 마운트될 수 있음 (ex. /dev/vda)
가상 디스크 경로가 다를 경우, controlplane.yaml, worker.yaml내 디스크 경로를 수정해야함
$ CP_IP=192.168.0.106
$ talosctl disks --insecure \
    --nodes $CP_IP

DEV          MODEL           SERIAL   TYPE      UUID   WWID   MODALIAS      NAME   SIZE     BUS_PATH                                                                  SUBSYSTEM          READ_ONLY   SYSTEM_DISK
/dev/loop0   -               -        UNKNOWN   -      -      -             -      4.1 kB   /virtual                                                                  /sys/class/block   *
/dev/loop1   -               -        UNKNOWN   -      -      -             -      684 kB   /virtual                                                                  /sys/class/block   *
/dev/loop2   -               -        UNKNOWN   -      -      -             -      77 MB    /virtual                                                                  /sys/class/block   *
/dev/sda     QEMU HARDDISK   -        HDD       -      -      scsi:t-0x00   -      54 GB    /pci0000:00/0000:00:05.0/0000:01:01.0/virtio2/host2/target2:0:0/2:0:0:0   /sys/class/block
/dev/sr0     QEMU DVD-ROM    -        CD        -      -      scsi:t-0x05   -      108 MB   /pci0000:00/0000:00:01.1/ata2/host1/target1:0:0/1:0:0:0                   /sys/class/block
Kubernetes 구성 및 설치
- 공통 환경 변수 설정
export TALOS_CUSTOM=$HOME/talos_conf
export TALOSCONFIG=$TALOS_CUSTOM/config/talosconfig

export CONTROLPLANE_IP=192.168.0.106
export CONTROLPLANE_IPS=("192.168.0.106")
export WORKER_IPS=("192.168.0.107" "192.168.0.108")- talos 콘픽 폴더 생성
mkdir -p $TALOS_CUSTOM/config
mkdir -p $TALOS_CUSTOM/patches
mkdir -p $TALOS_CUSTOM/results- secrets.yaml 생성
talosctl gen secrets -o $TALOS_CUSTOM/config/secrets.yaml- Kubernetes Cluster Configurations 생성
- patch
- allow-controlplane-workloads.yaml : Control Plane 에서 Workloads 작업 허용
- patch

- ipvs-strict-arp-enabled.yaml : metalLB 사용 시, Strict ARP 설정
- none-network-cni.yaml : Cilium CNI 사용을 위해 기본 Network CNI None 처리

- disable-kube-proxy.yaml : Cilium CNI 에서 kube-proxy 대체

- control-plane-patch.yaml
- worker-patch.yaml
cat << EOF > $TALOS_CUSTOM/patches/allow-controlplane-workloads.yaml
# patches/allow-controlplane-workloads.yaml
cluster:
  allowSchedulingOnControlPlanes: true
EOF

cat << EOF > $TALOS_CUSTOM/patches/ipvs-strict-arp-enabled.yaml
# patches/ipvs-strict-arp-enabled.yaml
- op: add
  path: /cluster/proxy
  value:
    disabled: false
    mode: ipvs
    extraArgs:
      ipvs-strict-arp: true
EOF

cat << EOF > $TALOS_CUSTOM/patches/none-network-cni.yaml
# patches/none-network-cni.yaml
- op: add
  path: /cluster/network/cni
  value:
    name: none
EOF

cat << EOF > $TALOS_CUSTOM/patches/disable-kube-proxy.yaml
# patches/disable-kube-proxy.yaml
- op: add
  path: /cluster/proxy
  value:
    disabled: true
EOF

cat << EOF > $TALOS_CUSTOM/patches/control-plane-patch.yaml
# patches/control-plane-patch.yaml
- op: replace
  path: /machine/network
  value:
    interfaces:
      - interface: eth0
- op: replace
  path: /machine/network/interfaces/0
  value:
    interface: eth0
    dhcp: true
    mtu: 1500
EOF

cat << EOF > $TALOS_CUSTOM/patches/worker-patch.yaml
# patches/worker-patch.yaml
- op: replace
  path: /machine/network
  value:
    interfaces:
      - interface: eth0
- op: replace
  path: /machine/network/interfaces/0
  value:
    interface: eth0
    dhcp: true
    mtu: 1500
EOF- config
- output
- config은 $TALOS_CUSTOM 폴더에 생성된다.
- $TALOS_CUSTOM/config/controlplane.yaml
- $TALOS_CUSTOM/config/worker.yaml
- $TALOS_CUSTOM/talosconfig
- config은 $TALOS_CUSTOM 폴더에 생성된다.
- output
talosctl gen config my-talos-cluster https://$CONTROLPLANE_IP:6443 \
  --install-disk /dev/sda \
  --with-secrets $TALOS_CUSTOM/config/secrets.yaml \
  --kubernetes-version 1.31.2 \
  --config-patch @$TALOS_CUSTOM/patches/disable-kube-proxy.yaml \
  --config-patch @$TALOS_CUSTOM/patches/none-network-cni.yaml \
  --config-patch-control-plane @$TALOS_CUSTOM/patches/control-plane-patch.yaml \
  --config-patch-worker @$TALOS_CUSTOM/patches/worker-patch.yaml \
  --output-dir $TALOS_CUSTOM/config
- $TALOS_CUSTOM/talosconfig 내 endpoint를 지정해준다.
talosctl config endpoint $CONTROLPLANE_IPS
- hostname 변경
CONTROLPLANE_IPS=("192.168.0.106")
WORKER_IPS=("192.168.0.107" "192.168.0.108")

index=1
for CONTROLPLANE_IP in "${CONTROLPLANE_IPS[@]}"; do
  talosctl machineconfig patch $TALOS_CUSTOM/config/controlplane.yaml \
    --nodes "$CONTROLPLANE_IP" \
    --patch '[{"op": "add", "path": "/machine/network/hostname", "value": "talos-cp-'$(printf '%02d' $index)'"}]' \
    --output $TALOS_CUSTOM/results/talos-cp-$(printf '%02d' $index).yaml
  index=$((index + 1))
done

index=1
for WORKER_IP in "${WORKER_IPS[@]}"; do
  talosctl machineconfig patch $TALOS_CUSTOM/config/worker.yaml \
    --nodes "$WORKER_IP" \
    --patch '[{"op": "add", "path": "/machine/network/hostname", "value": "talos-worker-'$(printf '%02d' $index)'"}]' \
    --output $TALOS_CUSTOM/results/talos-worker-$(printf '%02d' $index).yaml
  index=$((index + 1))
done
control plane & worker 노드 콘픽 적용

- talosctl apply-config
- talosctl edit machineconfig
- talosctl patch machineconfig
- apply-config 재부팅 옵션
- 재부팅 적용 (--mode=reboot): 변경 사항을 적용하고 노드를 재부팅하여 업데이트
- 즉시 적용 (--mode=no-reboot): 재부팅 없이 즉시 적용. 재부팅이 필요한 변경 사항은 실패
- 다음 재부팅 시 적용 (--mode=staged): 변경 사항을 저장해 두고, 다음 재부팅 시 적용
- 자동 되돌리기 적용 (--mode=try): 즉시 변경 적용. 실패 시 1분 후 자동 되돌리기
- 대화형 모드 (--mode=interactive): TUI 기반 관리자를 통해 대화형으로 구성 변경
index=1
for CP_IP in "${CONTROLPLANE_IPS[@]}"; do
  talosctl apply-config \
    --insecure \
    --nodes "$CP_IP" \
    --file $TALOS_CUSTOM/results/talos-cp-$(printf '%02d' $index).yaml
  index=$((index + 1))
done
index=1
for WOR_IP in "${WORKER_IPS[@]}"; do
talosctl apply-config \
--insecure \
--nodes "$WOR_IP" \
--file $TALOS_CUSTOM/results/talos-worker-$(printf '%02d' $index).yaml
index=$((index + 1))
done- 메인 Control Plane 클러스터 구성
- Kubernetes 클러스터 구축
talosctl --nodes $CONTROLPLANE_IP bootstrap- Kubernetes 구성 확인
talosctl kubeconfig -n $CONTROLPLANE_IP $TALOS_CUSTOM/results

kubectl get nodes --kubeconfig $TALOS_CUSTOM/results/kubeconfig

- network CNI
- cilium

export KUBECONFIG=$TALOS_CUSTOM/results/kubeconfig

helm repo add cilium https://helm.cilium.io/
helm repo update cilium

helm install \
    cilium \
    cilium/cilium \
    --version 1.16.3 \
    --namespace kube-system \
    --set ipam.mode=kubernetes \
    --set kubeProxyReplacement=true \
    --set securityContext.capabilities.ciliumAgent="{CHOWN,KILL,NET_ADMIN,NET_RAW,IPC_LOCK,SYS_ADMIN,SYS_RESOURCE,DAC_OVERRIDE,FOWNER,SETGID,SETUID}" \
    --set securityContext.capabilities.cleanCiliumState="{NET_ADMIN,SYS_ADMIN,SYS_RESOURCE}" \
    --set cgroup.autoMount.enabled=false \
    --set cgroup.hostRoot=/sys/fs/cgroup \
    --set k8sServiceHost=localhost \
    --set k8sServicePort=7445 \
    --set hubble.relay.enabled=true \
    --set hubble.ui.enabled=true
- calico (Not tested)
helm repo add projectcalico https://docs.projectcalico.org/charts/
helm repo update projectcalico

helm install my-tigera-operator projectcalico/tigera-operator \
  --version 3.29.0 \
  --create-namespace \
  --namespace tigera-operator
기타 명령어
- 대시보드
talosctl -n <NODEIP> dashboard
- 서비스 목록
talosctl -n <NODEIP> service
- 프로세스 목록
talosctl -n <NODEIP> processes
- 쿠버네티스 버전 업그레이드
talosctl --nodes $CONTROLPLANE_IP upgrade-k8s \
--to "1.31.2"- 이미지 업그레이드
talosctl upgrade --nodes $CONTROLPLANE_IP --image factory.talos.dev/installer/4a0d65c669d46663f377e7161e50cfd570c401f26fd9e7bda34a0216b6f1922b:v1.8.3 -m powercycle -f확장
---
apiVersion: v1alpha1
kind: ExtensionServiceConfig
name: tailscale
environment:
  - TS_AUTHKEY=<your auth key>
tailscale.patch.yaml
talosctl patch mc \
  -n $CONTROLPLANE_IP \
  -p @$TALOS_CUSTOM/patches/tailscale.patch.yaml
machine patch
talosctl apply-config \
  --nodes $CONTROLPLANE_IP \
  --file $TALOS_CUSTOM/results/talos-cp-01.yaml
  --config-patch @$TALOS_CUSTOM/patches/tailscale.patch.yaml
apply-config patch
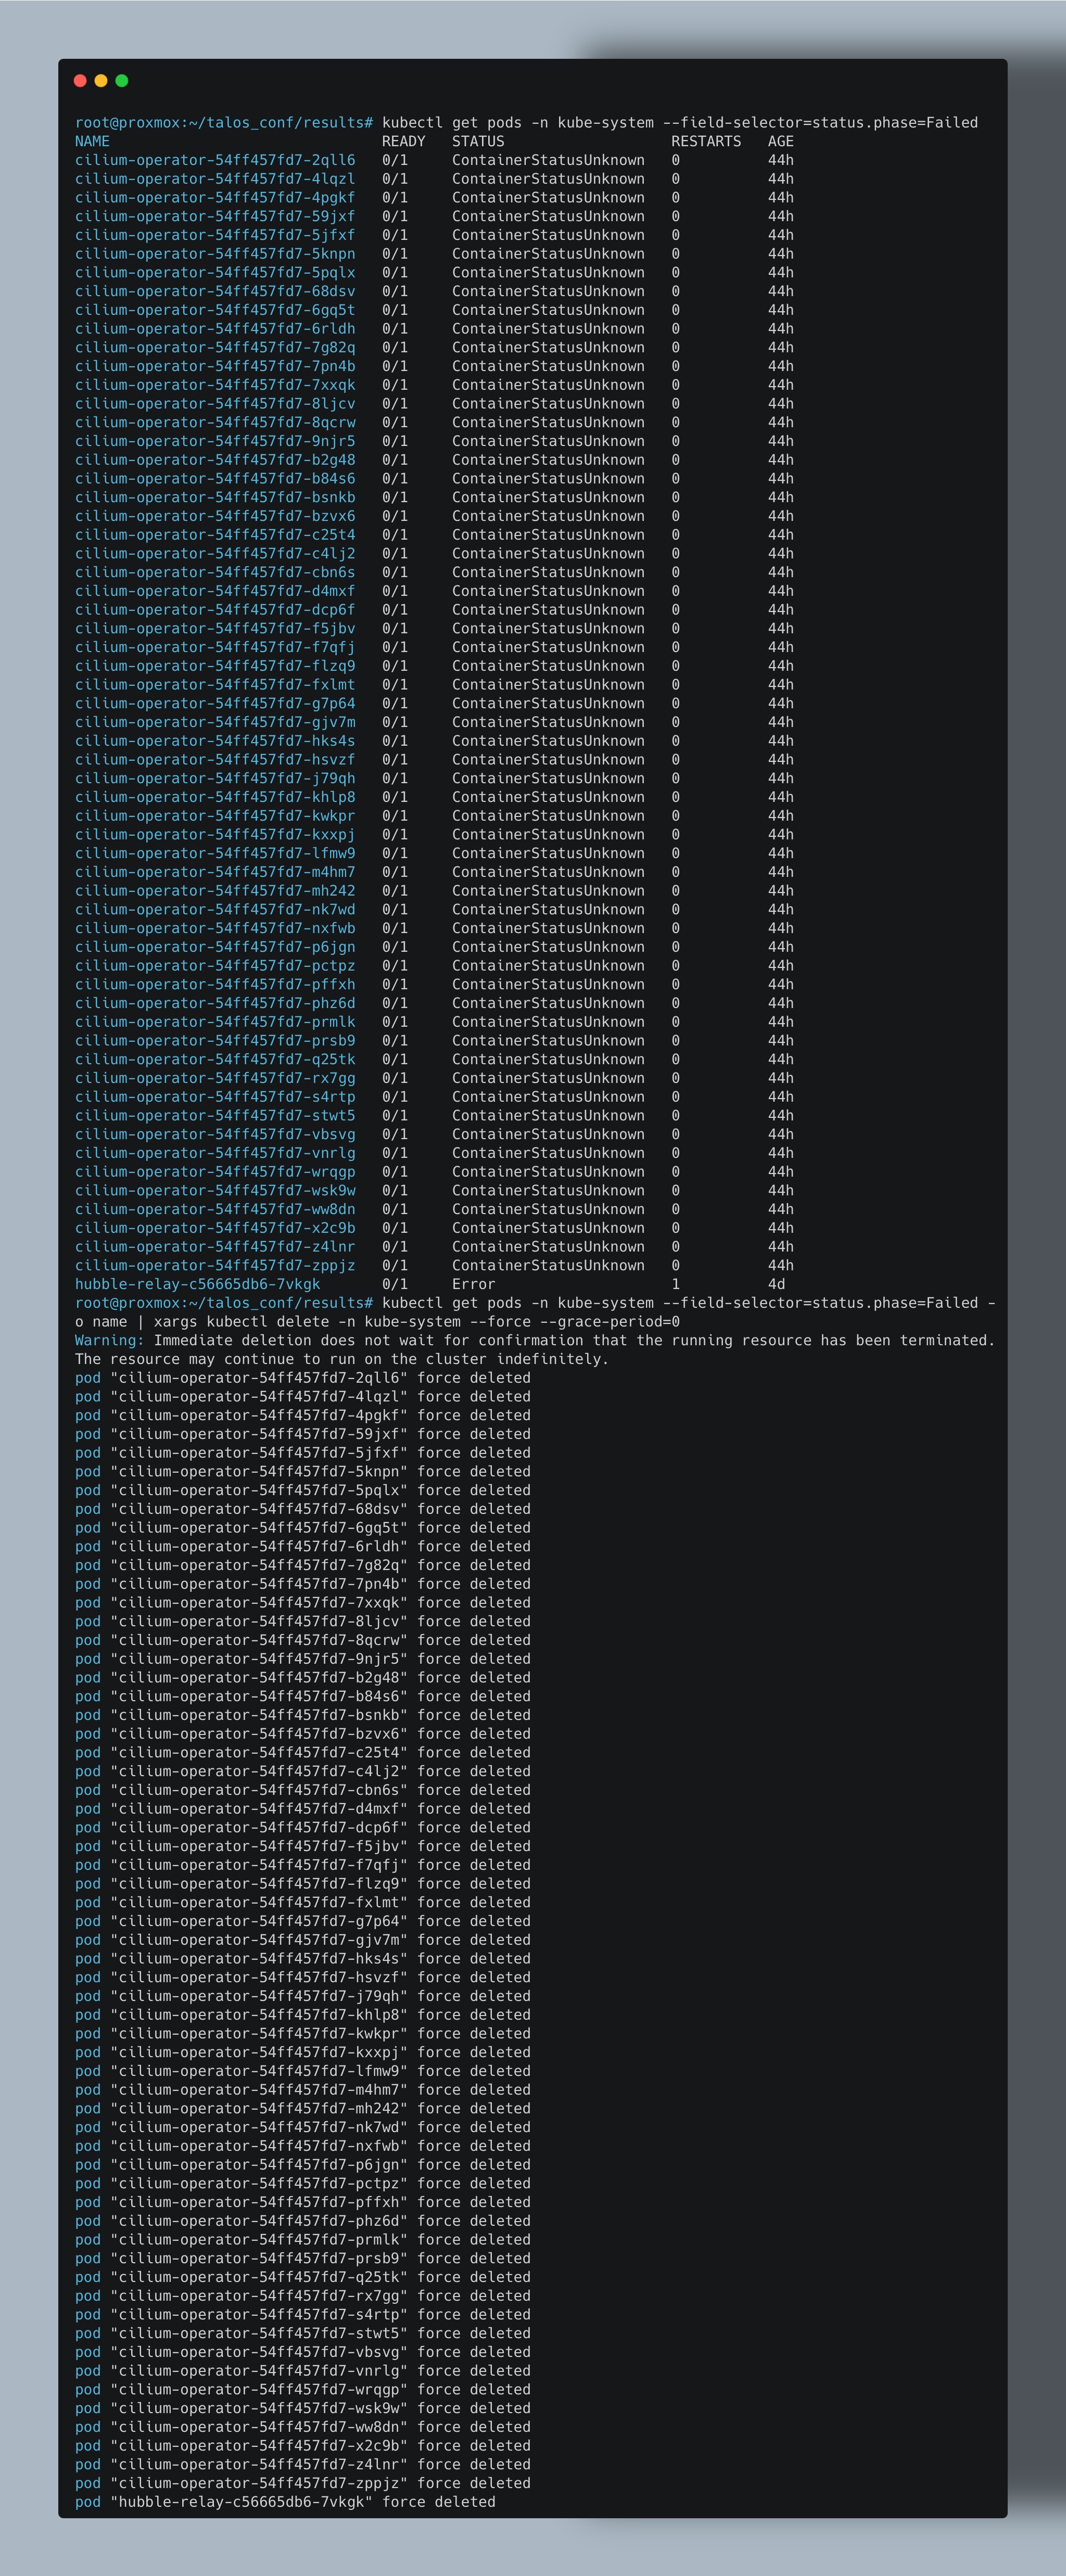
Trouble Shoot
kubectl get pods \
  -n kube-system \
  --field-selector=status.phase=Failed \
-o name | xargs kubectl delete -n kube-system --force --grace-period=0 
root@proxmox:~/talos_conf# mkdir config2
root@proxmox:~/talos_conf# talosctl gen config my-talos-cluster https://$CONTROLPLANE_IP:6443 \
  --install-disk /dev/sda \
  --with-secrets $TALOS_CUSTOM/config/secrets.yaml \
  --kubernetes-version 1.31.2 \
  --config-patch @$TALOS_CUSTOM/patches/disable-kube-proxy.yaml \
  --config-patch @$TALOS_CUSTOM/patches/none-network-cni.yaml \
  --config-patch-control-plane @$TALOS_CUSTOM/patches/control-plane-patch.yaml \
  --config-patch-worker @$TALOS_CUSTOM/patches/worker-patch.yaml \
  --output-dir $TALOS_CUSTOM/config2
generating PKI and tokens
Created /root/talos_conf/config2/controlplane.yaml
Created /root/talos_conf/config2/worker.yaml
Created /root/talos_conf/config2/talosconfig
root@proxmox:~/talos_conf# ls
config  config2  examples  patches  results
root@proxmox:~/talos_conf# diff config/controlplane.yaml config2/controlplane.yaml
506,593d505
<     # A list of inline Kubernetes manifests.
<     inlineManifests:
<         - name: cilium-install # Name of the manifest.
<           contents: | # Manifest contents as a string.
<             ---
<             apiVersion: rbac.authorization.k8s.io/v1
<             kind: ClusterRoleBinding
<             metadata:
<               name: cilium-install
<             roleRef:
<               apiGroup: rbac.authorization.k8s.io
<               kind: ClusterRole
<               name: cluster-admin
<             subjects:
<             - kind: ServiceAccount
<               name: cilium-install
<               namespace: kube-system
<             ---
<             apiVersion: v1
<             kind: ServiceAccount
<             metadata:
<               name: cilium-install
<               namespace: kube-system
<             ---
<             apiVersion: batch/v1
<             kind: Job
<             metadata:
<               name: cilium-install
<               namespace: kube-system
<             spec:
<               backoffLimit: 10
<               template:
<                 metadata:
<                   labels:
<                     app: cilium-install
<                 spec:
<                   restartPolicy: OnFailure
<                   tolerations:
<                     - operator: Exists
<                     - effect: NoSchedule
<                       operator: Exists
<                     - effect: NoExecute
<                       operator: Exists
<                     - effect: PreferNoSchedule
<                       operator: Exists
<                     - key: node-role.kubernetes.io/control-plane
<                       operator: Exists
<                       effect: NoSchedule
<                     - key: node-role.kubernetes.io/control-plane
<                       operator: Exists
<                       effect: NoExecute
<                     - key: node-role.kubernetes.io/control-plane
<                       operator: Exists
<                       effect: PreferNoSchedule
<                   affinity:
<                     nodeAffinity:
<                       requiredDuringSchedulingIgnoredDuringExecution:
<                         nodeSelectorTerms:
<                           - matchExpressions:
<                               - key: node-role.kubernetes.io/control-plane
<                                 operator: Exists
<                   serviceAccount: cilium-install
<                   serviceAccountName: cilium-install
<                   hostNetwork: true
<                   containers:
<                   - name: cilium-install
<                     image: quay.io/cilium/cilium-cli-ci:latest
<                     env:
<                     - name: KUBERNETES_SERVICE_HOST
<                       valueFrom:
<                         fieldRef:
<                           apiVersion: v1
<                           fieldPath: status.podIP
<                     - name: KUBERNETES_SERVICE_PORT
<                       value: "6443"
<                     command:
<                       - cilium
<                       - install
<                       - --set ipam.mode=kubernetes
<                       - --set kubeProxyReplacement=true
<                       - --set hubble.relay.enabled=true
<                       - --set hubble.ui.enabled=true
<                       - --set securityContext.capabilities.ciliumAgent="{CHOWN,KILL,NET_ADMIN,NET_RAW,IPC_LOCK,SYS_ADMIN,SYS_RESOURCE,DAC_OVERRIDE,FOWNER,SETGID,SETUID}"
<                       - --set securityContext.capabilities.cleanCiliumState="{NET_ADMIN,SYS_ADMIN,SYS_RESOURCE}"
<                       - --set cgroup.autoMount.enabled=false
<                       - --set cgroup.hostRoot=/sys/fs/cgroup
<                       - --set k8sServiceHost=localhost
<                       - --set k8sServicePort=7445
620a533,541
>
>     # # A list of inline Kubernetes manifests.
>     # inlineManifests:
>     #     - name: namespace-ci # Name of the manifest.
>     #       contents: |- # Manifest contents as a string.
>     #         apiVersion: v1
>     #         kind: Namespace
>     #         metadata:
>     #                 name: ci


댓글